Quick links:
Sharing your recordings on Moodle (or elsewhere)
Watch the video guide for Sharing your recordings on Moodle
- Navigate to the videos folder location (OneDrive/SharePoint/Teams)
- Tap on the ... and select Share
- Next to the file name, tap on the Settings cog icon
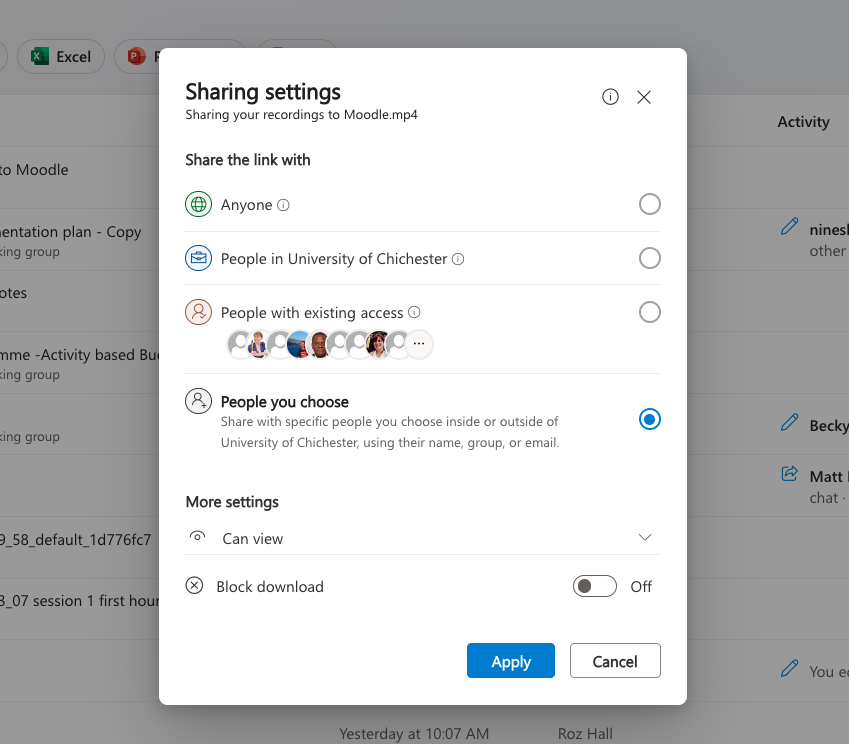
- Under the Sharing options, you can choose who you want to share the recording with
- People in the University of Chichester: meaning that they will have to login to view it
- Anyone: meaning that people will be able to view without logging in. This may include people outside of the organisation
- Once you have chosen who you want to share it with, under More settings, choose Can view (can not make changes)
- Select Apply
- Select the Copy link button
- This gives you a link that you can copy and paste into Moodle (or use elsewhere)
- Navigate to your Moodle page and paste in the URL
- You can do this by: enabling Edit mode and then Add a resource or activity and choosing Hyperlink
- Make sure that you name the resource clearly so that your students know to find the recordings there
Please Note: When needing to share the link again in future, make sure to use Manage Access rather than 'Copy Link'.
General information on sharing from OneDrive
The files on your OneDrive are private until you share them.
- You can share individual files, or a folder full of files
- You can choose to share with individual people, to anyone at the university, or to anyone without having to login (this could include someone external from the organisation)
- When you share, you can choose for people to have editing access to the file, or to just be able to view.
This all works the same whether you're sharing a Word document, a PowerPoint presentation, and image or a video.
For a detailed guide for sharing from OneDrive, please see Microsoft's guide: Share OneDrive files and folders - Microsoft Support


