This guide explains how to insert images from different sources, adjust text wrapping, and apply basic formatting options.
Inserting Images and Icons
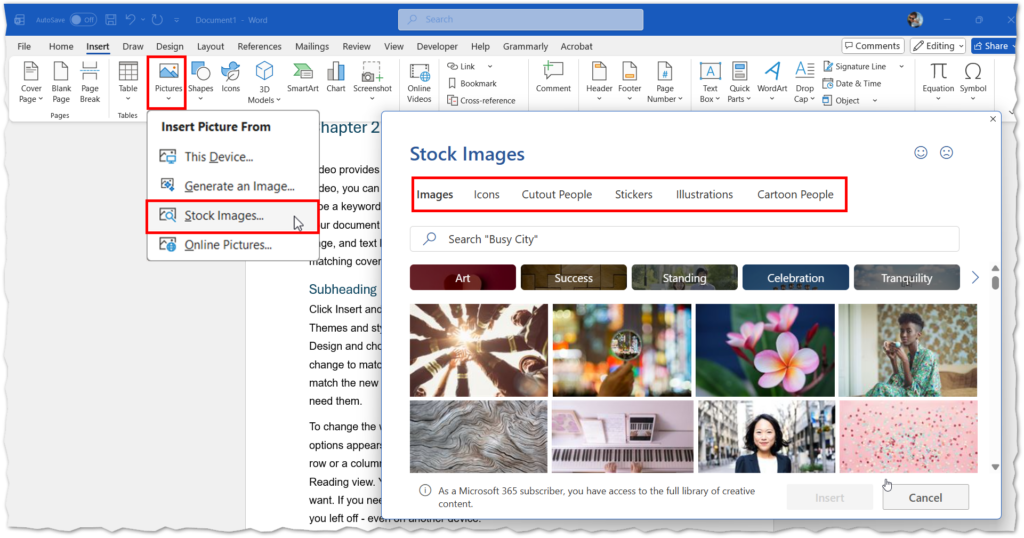
- Go to the Insert tab on the Ribbon.
- Click Pictures and choose one of the following:
- This Device – to insert an image from your computer.
- Stock Images – to access Microsoft’s library, which includes:
- Images
- Icons
- Cutout People
- Stickers
- Illustrations
- Cartoon People
- Browse the category you need, select your image or icon, and click Insert.
Picture
Text Wrapping
By default, images are inserted In Line with Text, behaving like a text character. To change this:
- Select the image.
- Go to the Picture Format tab.
- Click Wrap Text and choose an option such as:
| Option | Description | Best Use |
In Line with Text | Treats the image like a text character within a paragraph. Moves as you type. | Simple documents where precise positioning isn’t needed. |
Square | Text wraps around the image in a square or rectangular shape. | Clean, structured layouts for images with straight edges. |
Tight | Text wraps closely around the actual shape of the image. | Images with irregular shapes or transparent backgrounds. |
Through | Similar to Tight, but text can fill open areas inside the image. | Complex shapes or cutout images for integrated look. |
Top and Bottom | Text appears only above and below the image, leaving space on the sides. | When you want the image to stand out without text wrapping around it. |
Behind Text | Places the image behind the text, like a watermark. | Decorative backgrounds (ensure text remains readable). |
In Front of Text | Places the image on top of the text, covering it. | Design purposes or layered effects (not for regular text). |
Positioning Options
After changing text wrapping to any option but ‘In line with text’ you will be able to change how the image behaves, when text around it moves.
- Select the image.
- Go to Picture Format → Position.
- Choose:
- Move with text – ideal for icons used as bullet points.
- Fix position on page – keeps images in a set location while text flows around them.
Basic Formatting
- Picture Styles: Add borders, shadows, and effects from the Picture Styles gallery.
- Picture Border: Apply an outline by choosing colour, weight, and style.