If you are using your assigned University laptop, you can sign in as you usually would. If you are using a loan laptop you will first need to connect to a Wi-Fi network. To do this at the login screen selecting the network button in the bottom right corner (see image below) and choose a Wi-Fi network.
Once you have successfully connected you can then sign in. If you are unable to connect to a Wi-Fi network you will receive the following message.
“We can’t sign you in with this credential because your domain isn’t available. Make sure your device is connected to your organization’s network and try again. If you previously signed in on this device with another credential you can sign in with that credential.”
Being connected to a Wi-Fi network enables your the laptop to validate your credentials using he University VPN system.
Alternatively you can connect the device via ethernet directly to your home router, or an open port in a business environment if available.
Connecting to Wi-Fi
For instructions on how to connect to a Wi-Fi network on Windows 10 please see the below support article from Microsoft.
It is not possible to connect to Wi-Fi before logging into the laptop.
Connecting to the University network
University laptops come pre-installed with the GlobalProtect Virtual Private Network (VPN) which creates a secure connection between the laptop and the University. This is required to access restricted software whilst off campus and to connect to network drives.
The GlobalProtect VPN should automatically connect when you are connected to Wi-Fi. On occasion it may be required to manually connect to the VPN. Follow the steps below to connect to the VPN
Please ensure that the laptop has an Internet connection before continuing.
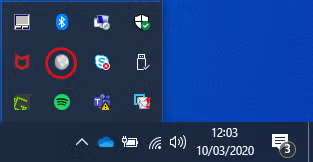
Locate the System Tray on your computer, this is the area which has the clock and icons such as Wi-Fi, Volume, Battery and OneDrive. To show more Icons press the up arrow (circled in red below) and an expanded pane will be displayed
2. In the system tray locate the GlobalProtect VPN icon.
The symbol may be either of the two shown below. In the example above the icon is the former.
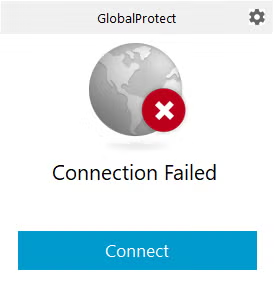
3. Single left click this icon to display the GlobalProtect VPN window.
4.Press the blue “Connect” button to reconnect
5. The status window will then change to show the VPN connecting.
6. Following this the status window will show as connected.
Note: Some corporate networks do not allow connections to VPNs. As such you may find issues connecting to the University VPN when connected to School or Corporate WiFi Networks.
Refreshing your connection
On occasion you may need to refresh your active VPN connection.
Before continuing please ensure that you are not actively uploading or downloading any files as this may interrupt your connection
In the system tray (shown in step 1 above) locate the GlobalProtect VPN icon (shown below), you may need to expand the system tray to find this icon.
2. In the top corner of the window press the cog icon (circled in red below). NB: Some devices have a version with three horizontal lines instead of the cog, the functionality of both icons is the same.
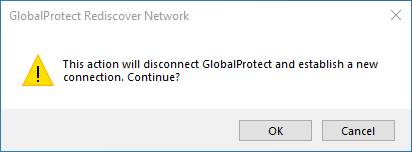
3. From the drop down click “Refresh connection” and when the warning dialogue box appears (shown below) select “OK”