What is MAF Online #
MAF (Module Accessment Feedback) Online is the University’s platform for grading, marking and giving feedback for student summative assessments.
You can use MAF Online for:
- Giving marks and/or grades
- Writing text feedback
- Attaching document feedback (Word, Excel, PDF, MP3 – under 30MB)
- Linking to video or audio feedback
- Second marking (Dissertations only)
- Moderation
Accessing MAF Online
- MAF online is accessed via ChiView
Module Coordinators will automatically have access to their modules in MAF Online. Module Coordinators and Department Administrators can add any required additional markers
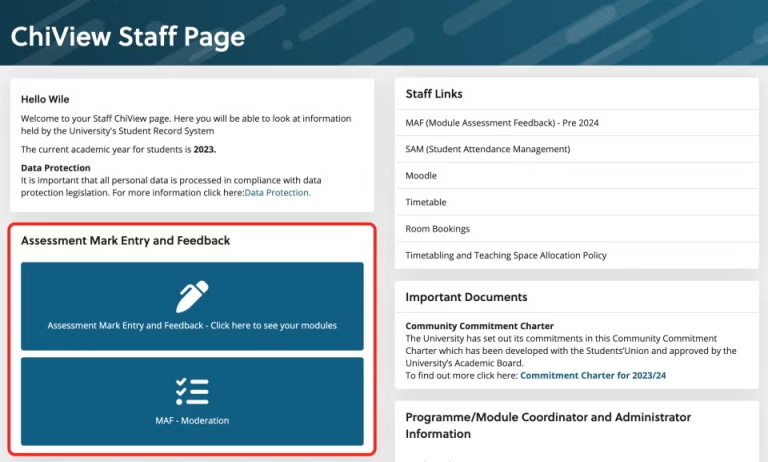
Accessing MAF Online in ChiView
Navigating MAF Online
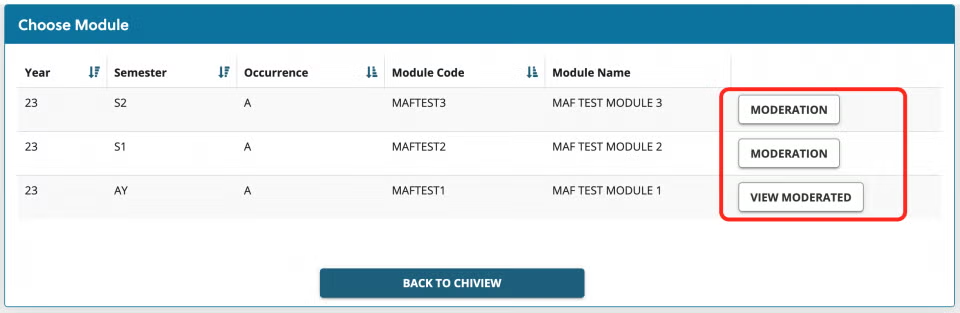
Choose module screen #
When you first access MAF Online, you’ll be shown a list of the modules you’ve been given to mark. If you are the module coordinator, you’ll automatically have access to the module and will be able to add additional markers.

- View all modules you have access to
- re-order your columns alphabetically
- See number of assessments still to be marked
- Adding additional markers (you must be the module coordinator)
Assessment screen #
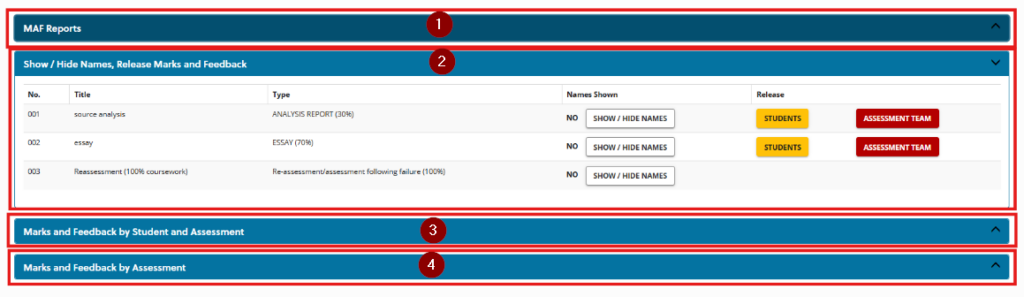
Sections
The assessment screen is split into four sections.
1. MAF Reports
This is where you can print PDF summaries of all MAFs or all Moderated MAFs
2. Show / Hide Names, Release Marks and Feedback
This is where you can:
- View all assessments for the module
- Release marks/grades and feedback to students
- Release marks/grades and feedback to the assessment team
- Select to Show or Hide names (for within the Marks and Feedback by Assessment section areas)
The second two sections are both for marking and leaving feedback, but in slightly different ways
3. Marks and Feedback by Student and Assessment
This view will show you:
- View dyslexia stickers
- View feedback
- View marks and grades
This view shows you everything in one place
4. Marks and Feedback by Assessment
This view will show you:
- A single screen for each assignment
This view allows you to quickly add marks/grades for an assignment
Marks and Feedback by Student and Assessment
This view will show all students and all assessments in one view.
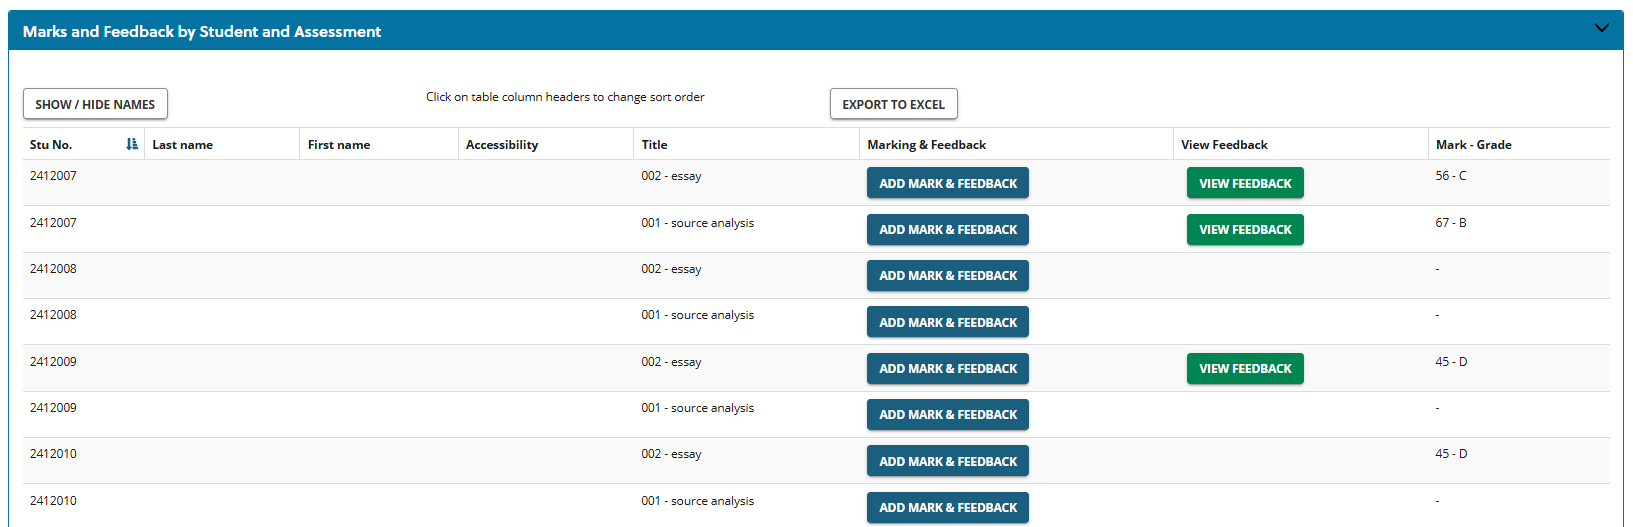
From this view you can:
- Show/hide student names (the default is to only show student number)
- See which students have a dyslexia sticker
- Add marks and feedback
- View feedback
- View mark and grade
Marks and Feedback by Assessment
This view helps you to focus on a single assessment, and supports quick adding of marks/grades. Please note the dyslexia sticker will not display here.
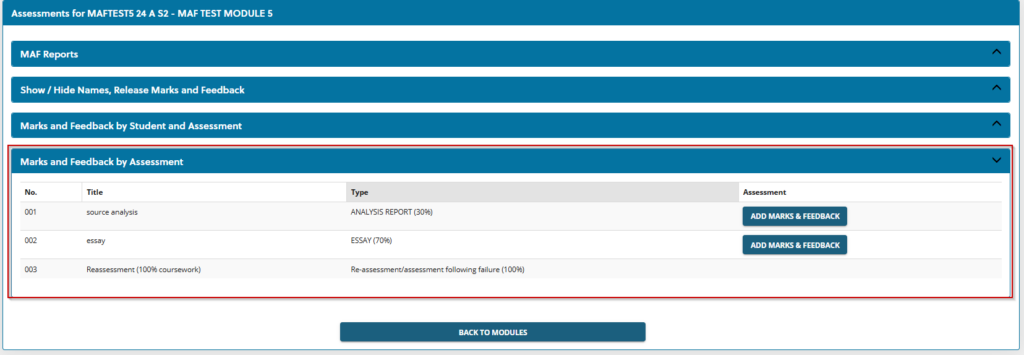
- Select Marks and Feedback to open up the details of each assessment
- All students will be listed, but you can use the search box to search for individual students
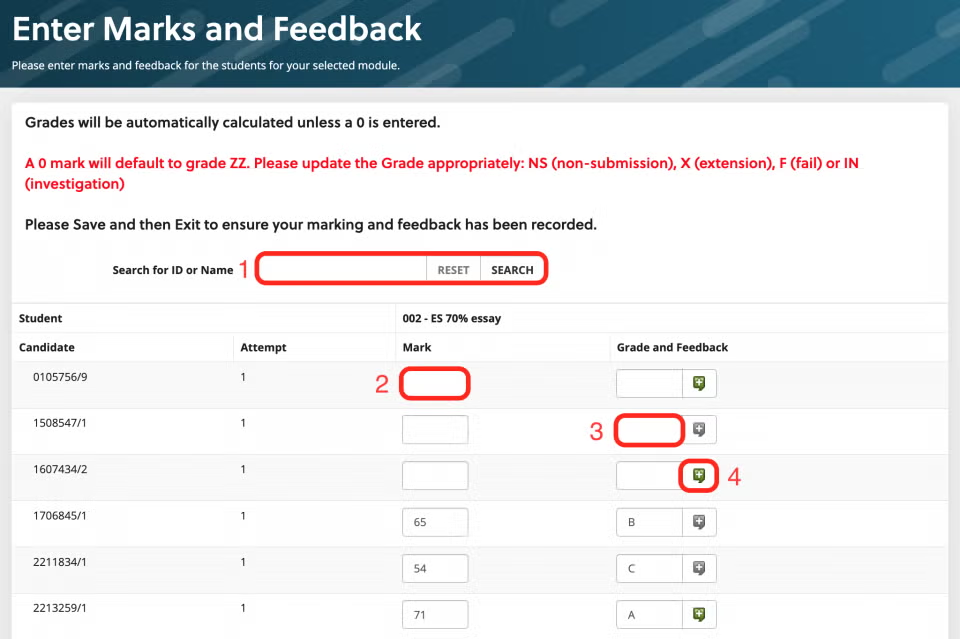
- Add a mark in the Mark box
- A 0 (zero) mark will default to grade ZZ. Please update the Grade appropriately: NS (non-submission), X (extension), F (fail) or IN (investigation)
- The grade field will update automatically, except for a 0, see above
- Select the speech bubble to add feedback
- If the speech bubble is green, it means that feedback has already been saved.
Having names showing within the ‘Marks and Feedback by Assessment’ section #
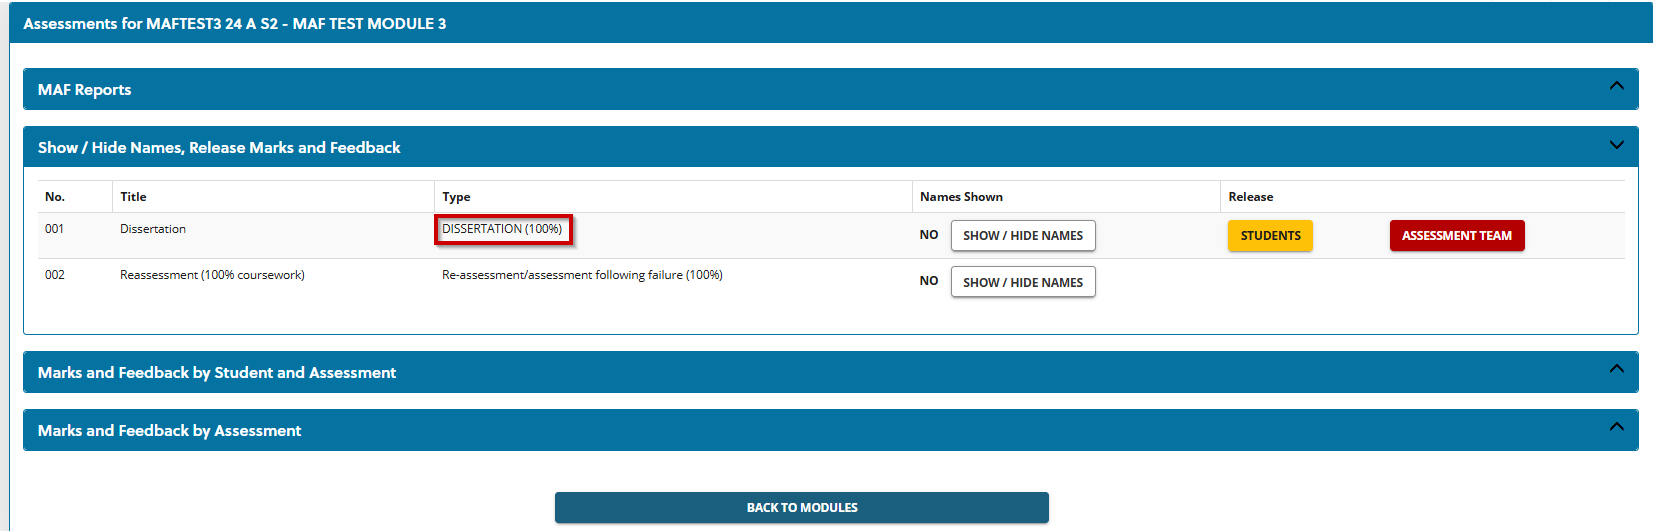
Names can be displayed if needed, for each assignment in the Marks and Feedback by Assessment area.
To do this, go to the ‘Show / Hide Names, Release Marks and Feedback’ section, as shown below. Then click the ‘Show / Hide Names’ button. There will be a button for each assignment type.

Once you have clicked ‘Show / Hide Names’ a new screen will open, in a new browser window. Use the drop down box to select ‘Yes’, and then click the store button, as shown in the image below. Repeat as necessary for the other assignment types.

Please note: The section ‘Marks and Feedback by Student and Assessment’ has its own button to show student names, within the section itself.
Adding marks and feedback
Enter Marks and Feedback #

- Add a mark in the Mark box
- A 0 (zero) mark will default to grade ZZ. Please update the Grade appropriately: NS (non-submission), X (extension), F (fail) or IN (investigation)
- The grade field will update automatically, except for a 0, see above
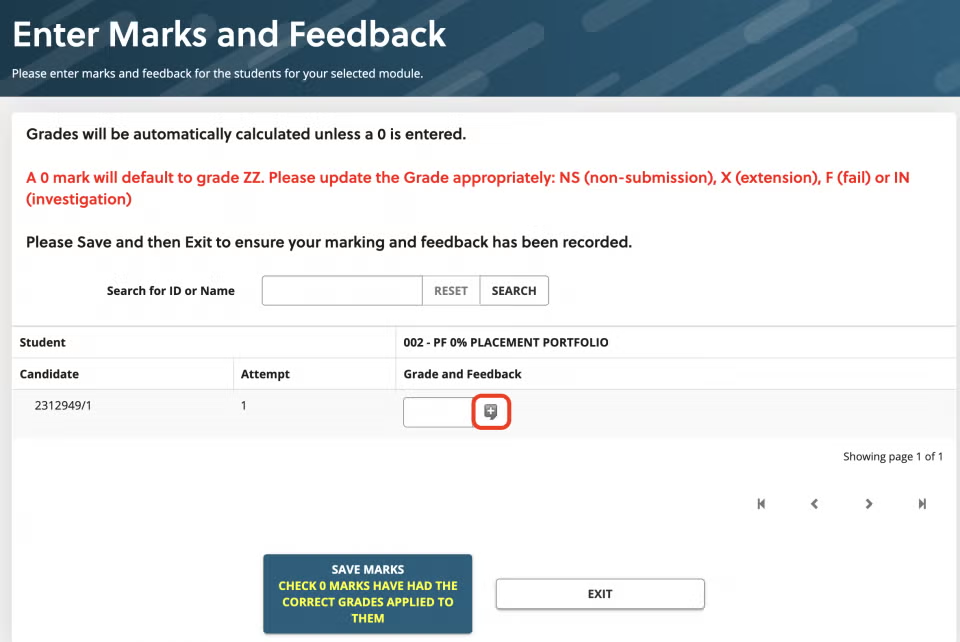
- Select the speech bubble to add feedback
- If the speech bubble is green, it means that feedback has already been saved.
- Save marks. Make sure you click this before exiting the screen
- Exit will take you back to the assessments, the modules or back to ChiView
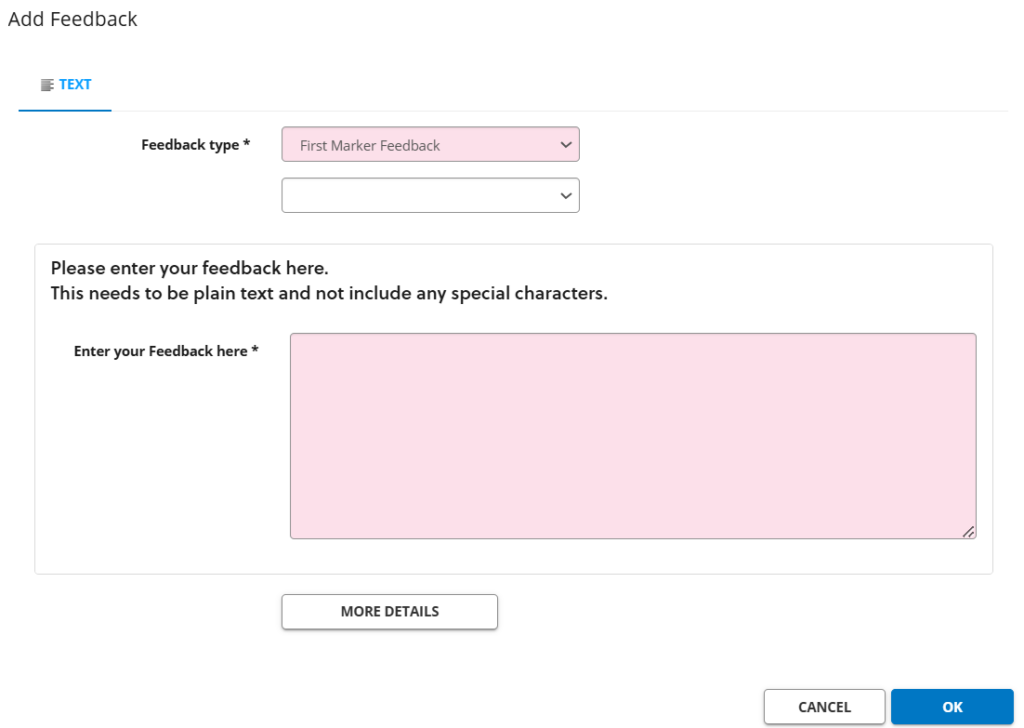
Adding Feedback #
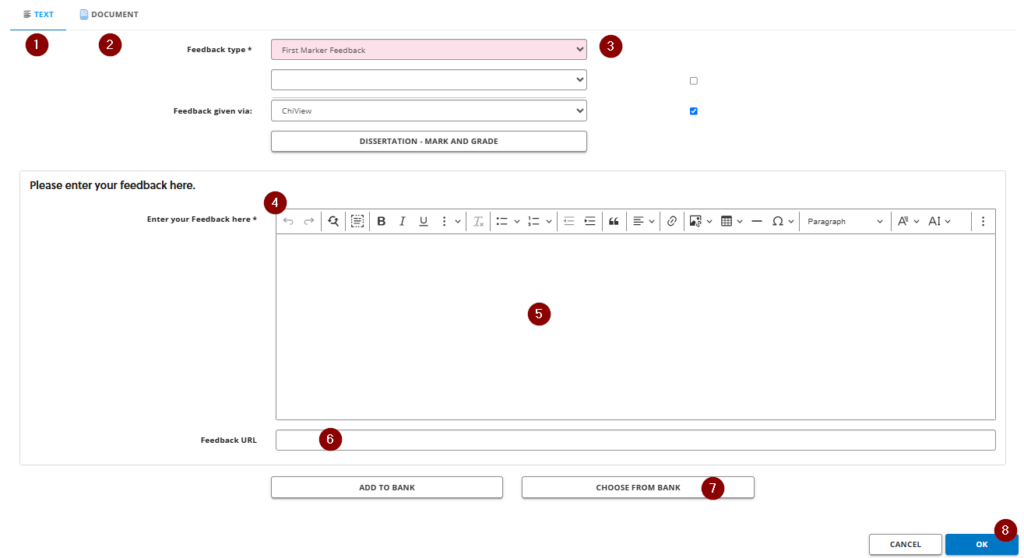
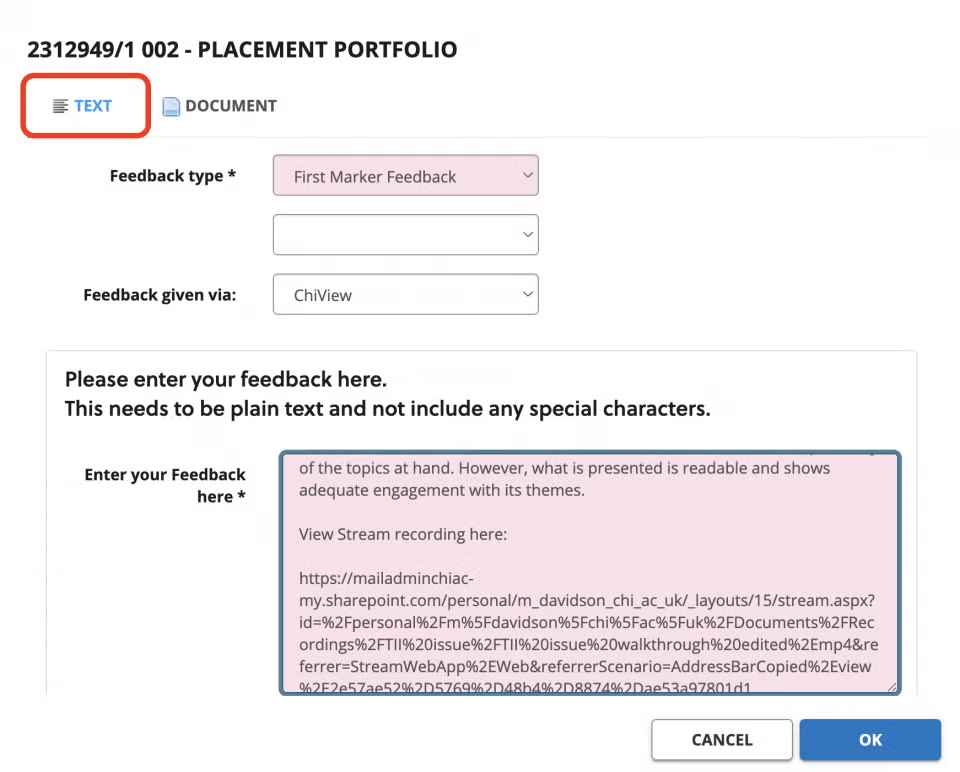
By default, feedback will be set to ‘Text’.
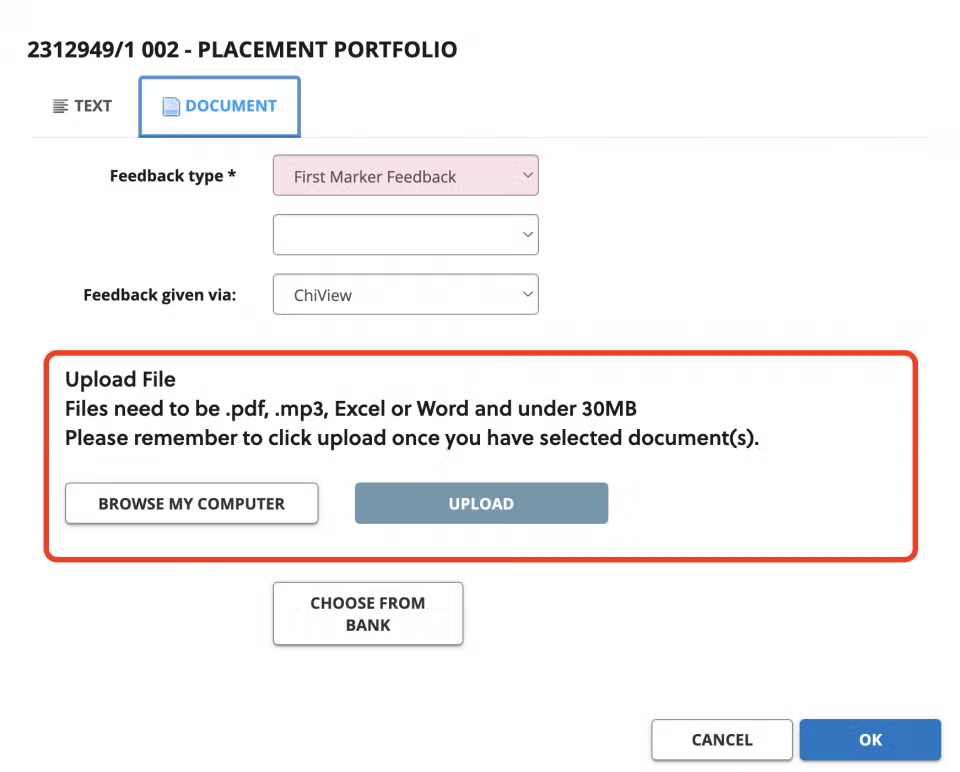
You can select ‘Document’ to instead upload a document of feedback.
By default this will be set to ‘First Marker’. This can be changed if it is a dissertation level module.
The text box has a tool bar allowing for various types of text editing.
The large space is the text field
The Feedback URL box allows for links, such as for feedback videos, can be shared. These should be stored securely on SharePoint or OneDrive, and a link giving permission for the student to view should be generated.
The ‘Choose from Bank’ button will allow you to select from feedback in the feedback bank.
- Click OK to save.
Spell Check #
To find out how to enable your web browser’s builtin spellchecker, please visit: Enabling and Configuring Browser-Based Spellcheckers
Adding attachments and links
In addition to text feedback, you’re able to attach files (such as annotated Word documents) and link to online documents (such as files and videos saved in OneDrive and SharePoint).
1. Firstly, click on the Feedback icon next to the Mark and Grade boxes
2. Select the Document tab at the top of the page
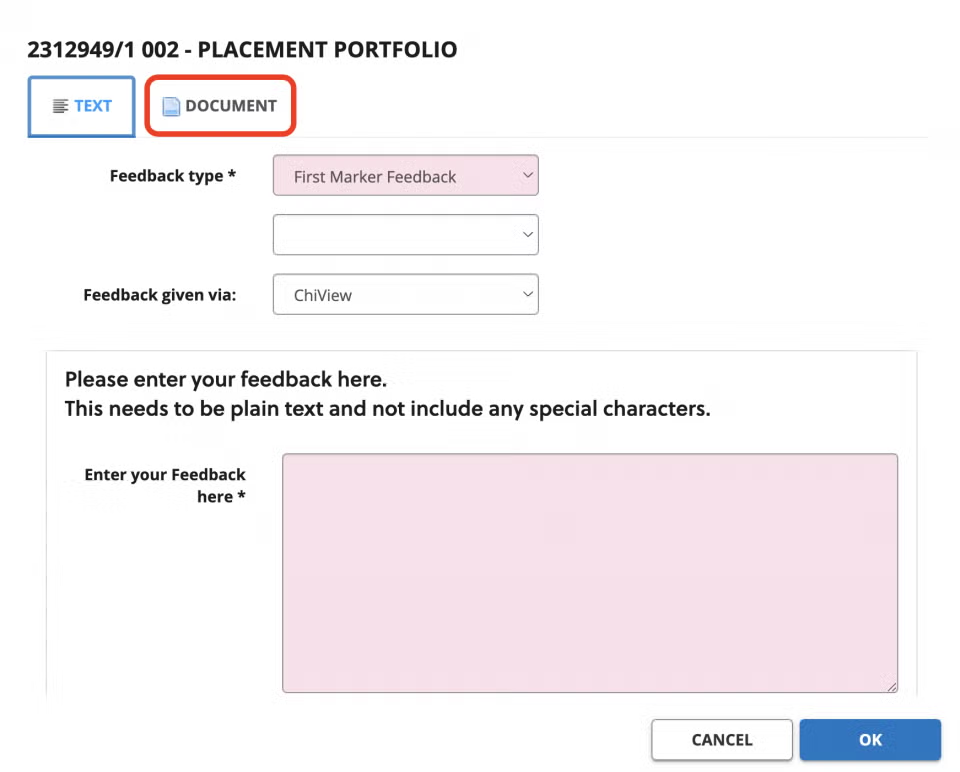
3. Browse for and upload the file you want to attach. MAF Online supports: Word, Excel, PDF and MP3 file types, up to 30MB in size
- You are able to select multiple files at the same time to upload more than one document
4. You can also add links to files that are stored online, such as videos or documents saved in OneDrive or SharePoint. Simply, paste the share link into the feedback Text box. You can find a guide for sharing OneDrive files here.
Adding additional markers
Adding additional markers #
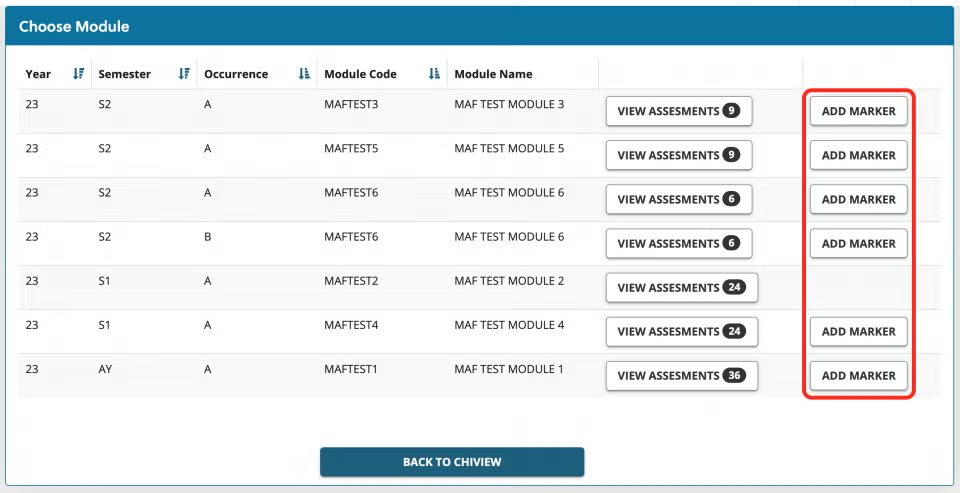
If you are recorded in ChiView as being the module coordinator, you’ll have automatic access to the module in MAF Online. You will be responsible for adding additional markers.
- On the Choose Module screen, select the Add Marker button
- If you do not see the Add marker button, then you are not recorded as being the module coordinator. Please ask the module coordinator to add you as a marker, or if you are the module coordinator, ask your department administrator to update the modules records (Module Coordinator Updates)
On the next screen:
1. Type in the tutor’s name
2. Select the Add Markers button
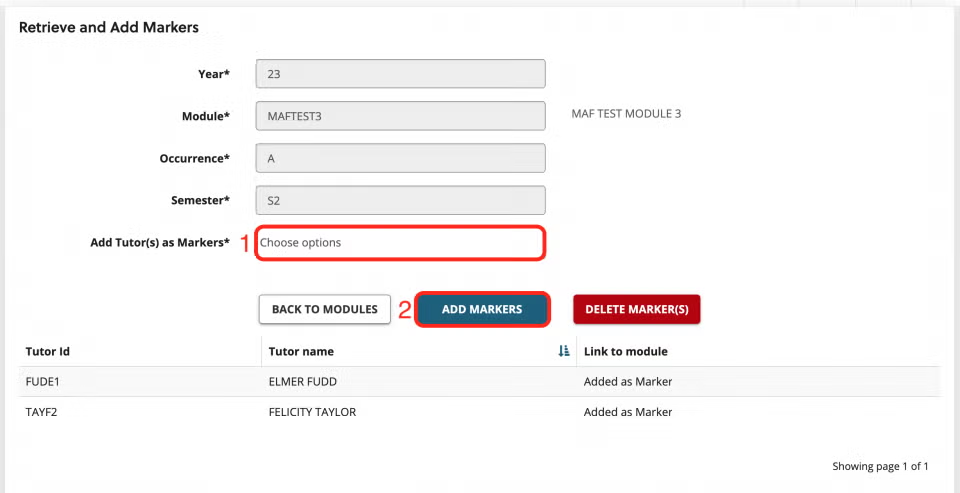
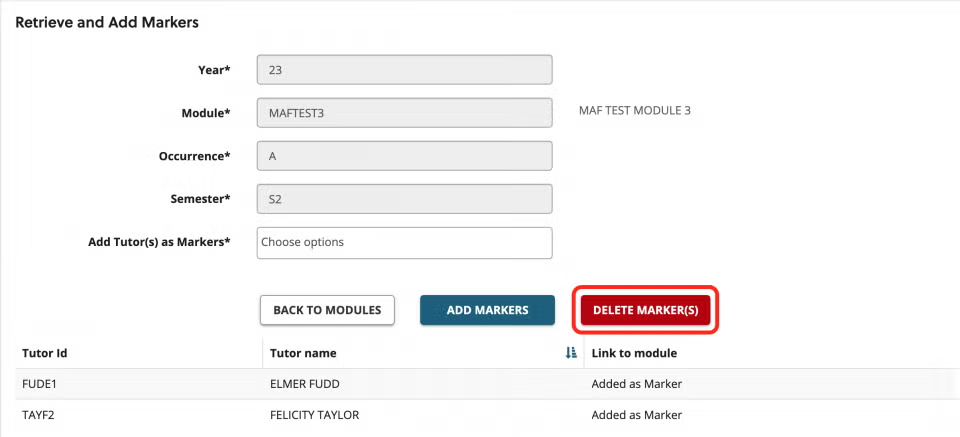
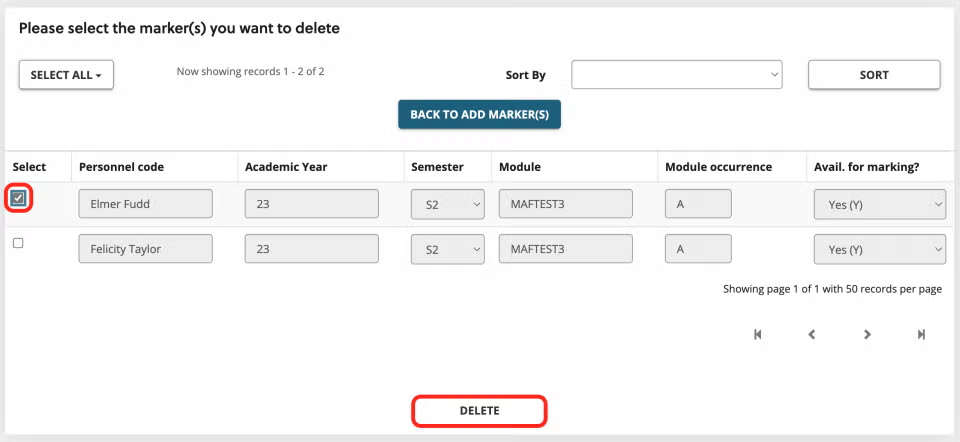
- Select them from the list of markers
- Press Delete at the bottom of the page
Releasing marks and feedback
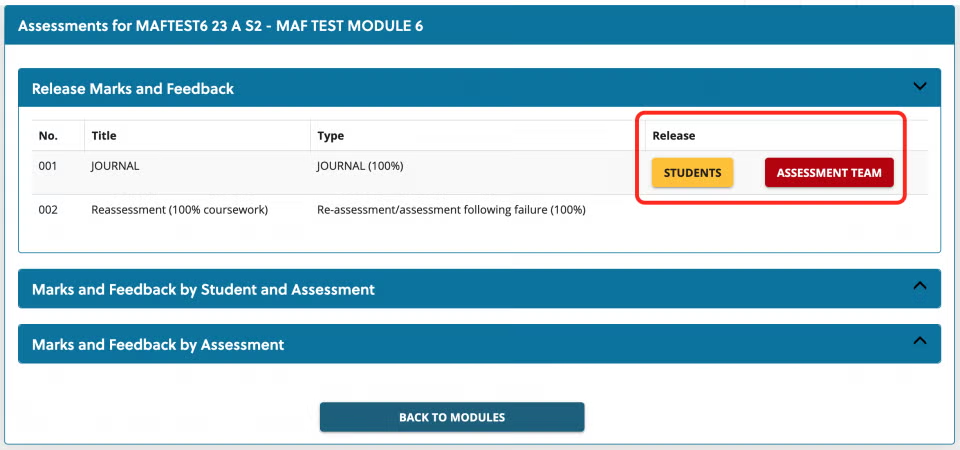
- At the top of the module screen, you will have the option, for each assessment, to release to Students and release to Assessment Team
Release to students #
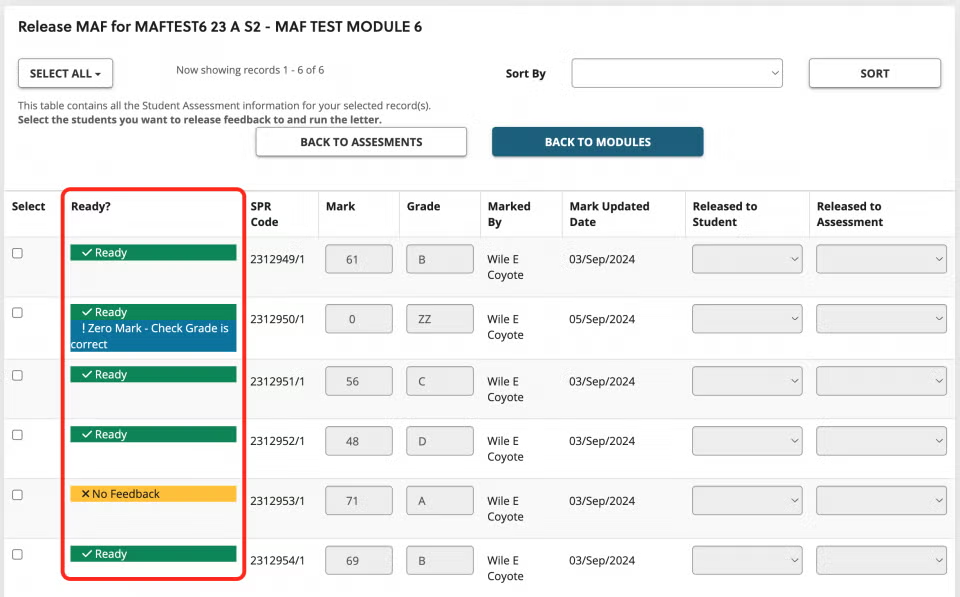
- Take this opportunity to review the marks and grades, and any warnings that are being displayed
- Make sure that Zero “0” marks are graded correctly: NS for non-submission, X for extension, F for fail and IN for investigation
- It will highlight if no feedback has been added. This may be expected and won’t stop you from releasing the grades to students
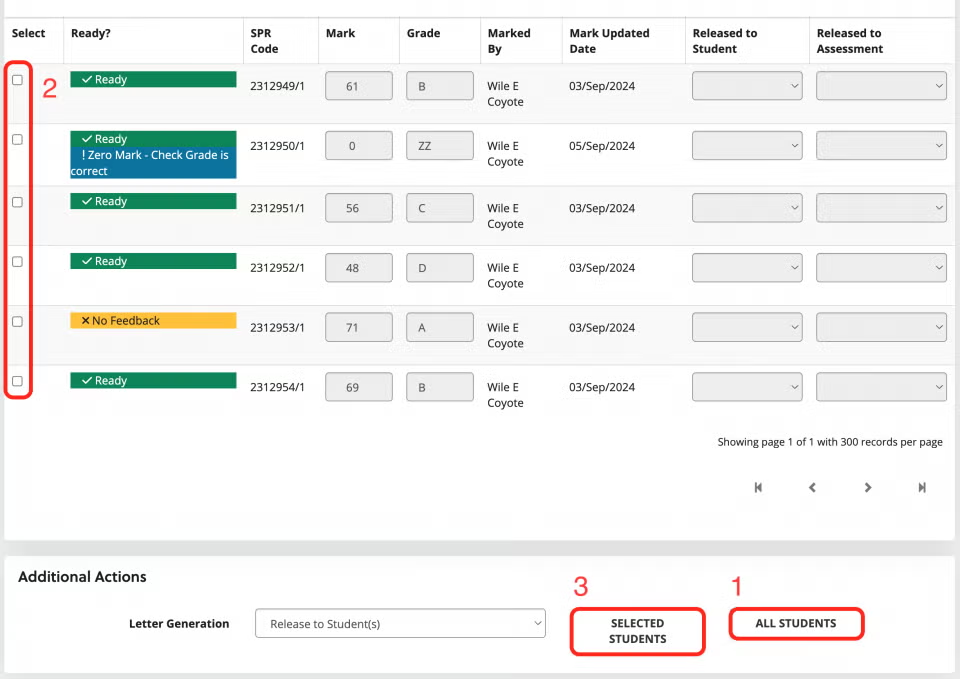
- You can release to All students in one easy click
- To release to selected students, you can select them using the tick boxes and…
- Release using the Selected students button
Release to Assessment Team #
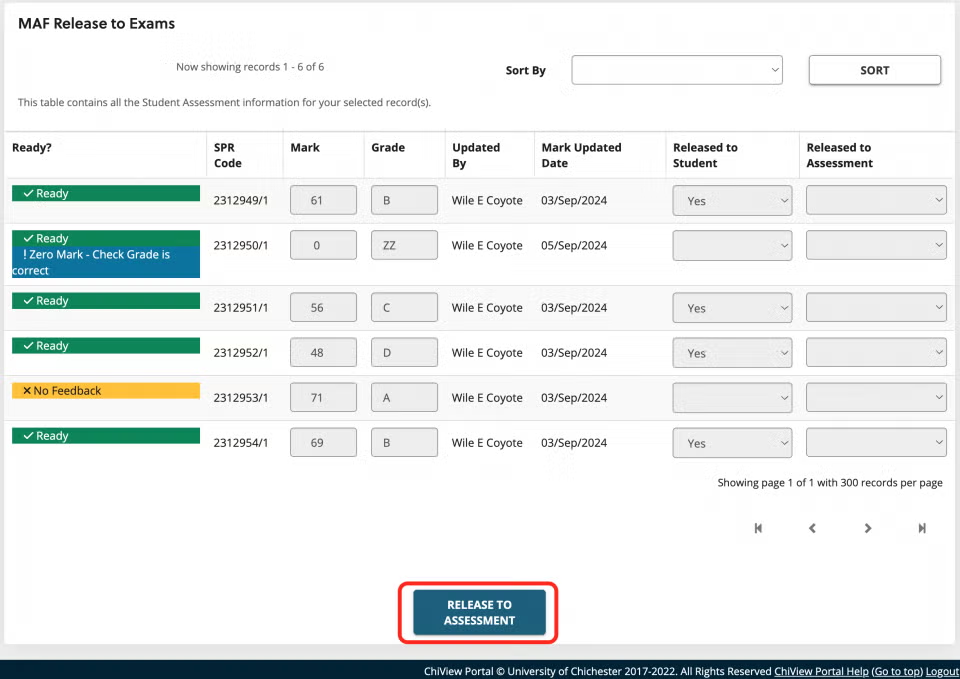
- Take this opportunity to review the marks and grades, and any warnings that are being displayed
- Make sure that Zero “0” marks are graded correctly: NS for non-submission, X for extension, F for fail and IN for investigation
- It will highlight if no feedback has been added. This may be expected and won’t stop you from releasing the grades to students
- To release marks, grades and feedback to the assessment team, select the Release to assessment button

- If there is any missing information, such as missing marks, grades or feedback, you will see a warning
- Select Back to assessments to correct anything that needs to be changed
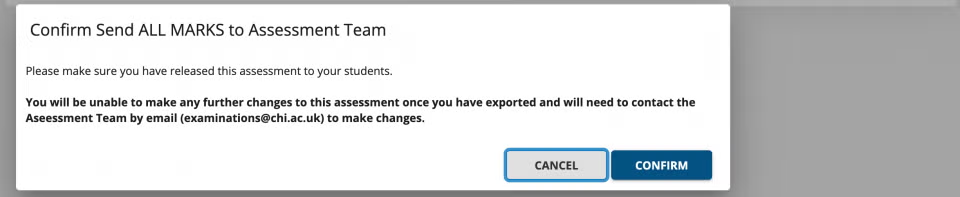
- Before you confirm, you will see this warning. Releasing to assessment team will make the grades, marks and feedback read-only.
- Once released, the buttons will disappear and be replaced by ticks.

To make any further changes after this point, you will need to email the Assessment team: examinations@chi.ac.uk
Dissertations - first, second, and agreed mark
- Second marking is only available for Dissertations
- You will not see the option to add Second Marker feedback or grades for anything other than dissertations
- Please note that for external examiners to see Dissertations, they still need to have been confirmed as moderated on MAF.
The first marker should navigate to the relevant module on MAF, then:
- Click ‘Add Mark & Feedback’ for the relevant student(s).
- Click the ‘speech bubble’ (add feedback) icon.
- Click on the ‘Feedback type’ drop down menu and select ‘First Marker Feedback’.
- Click the button ‘Dissertation – Mark and Grade’ and enter the mark and grade. E.g.: 60/B (This mark and grade will not show for students.)
- Click ‘Accept’.
- Enter feedback as necessary (from the bank, by entering text, and/or entering a URL).
- Click ‘OK’ at the bottom of the menu.
- At this stage, do not enter anything into the ‘Mark’ and ‘Grade and Feedback’ field shown below.
The second marker should navigate to the relevant module on MAF, then:
- Click ‘Add Mark & Feedback’ for the relevant student(s).
- Click the ‘speech bubble’ (add feedback) icon.
- On the new menu that appears, click the ‘Add Feedback’ button
- Click on the ‘Feedback type’ drop down menu and select ‘Second Marker Feedback’.
- Click the button ‘Dissertation – Mark and Grade’ and enter the mark and grade. E.g.: 60/B (This mark and grade will not show for students.)
- Click ‘Accept’.
- Enter feedback as necessary (from the bank, by entering text, and/or entering a URL).
- Click ‘OK’ at the bottom of the menu.
- On the next screen, click ‘Close’.
- At this stage, do not enter anything into the ‘Mark’ and ‘Grade and Feedback’ field shown below.
The person with responsibility for entering the agreed mark should navigate to the relevant module on MAF, then:
- Click ‘View Feedback’ for the relevant student(s) to gather any required information. A new browser window will open, and on this screen, the first marker and second marker’s mark and grade will show here.
- On the ‘Enter Marks and Feedback’ screen, complete the mark and grade fields, and click ‘Save Marks’.
Moderation
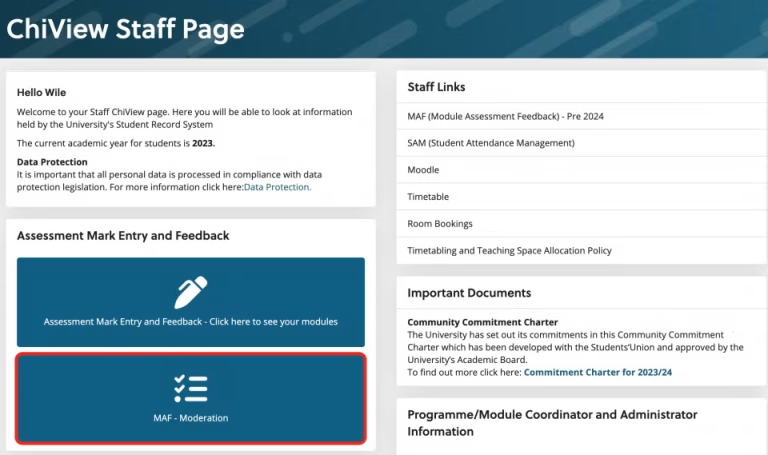
- Moderators will need to access MAF – Moderation via ChiView
- To see modules to moderate, you will need to have:
- been added as a marker to the module
- From here, you can view moderated modules or choose a module to moderate
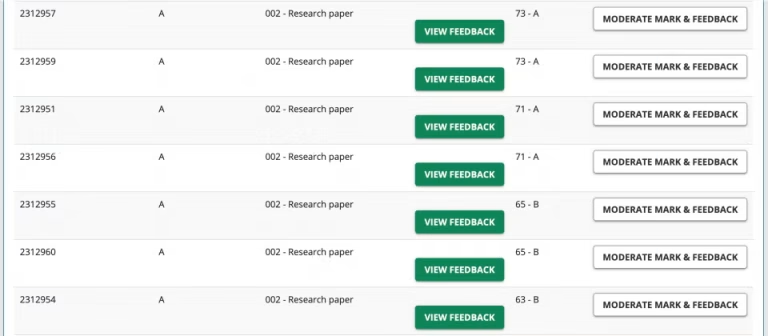
- Moderators can view the grade/mark and any feedback given
- Select Moderate Mark & Feedback for any you wish to moderate and make available to the External Examiner
A note on Moderation:
A sample of the scripts covering the full range of student performance should be moderated firstly by Internal Moderators and subsequently by External Examiners. The standard sample size is 20%, including all fails (or a minimum of 7 scripts; if this is not possible, due to student numbers, then – normally – all scripts should be included). Module Co-ordinators may increase or decrease the sample size with the agreement of their Head/Director of academic area or Programme Co-ordinator. The reason for the variance from the standard sample must be communicated to the External Examiner (copied to AQSS, Robert Herniman) when the sample is sent. The sample should have been internally moderated.

- You will be asked to confirm
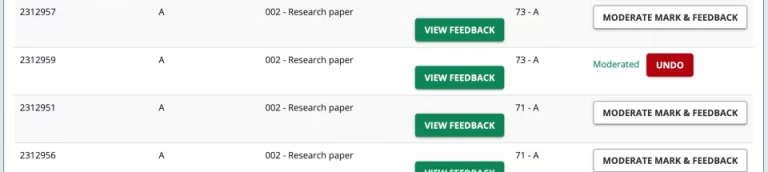
- Once confirmed, you can Undo if necessary
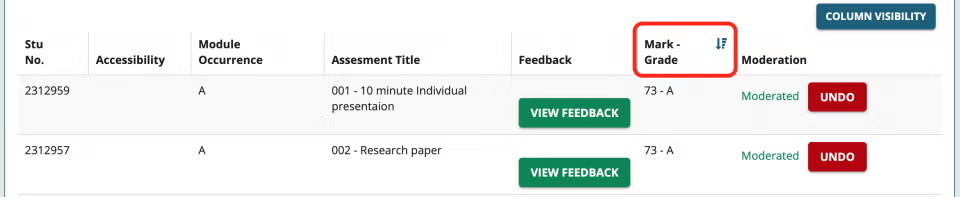
- You can order assignments from high to low, making moderation easier to navigate

- Once moderation is complete, select Confirm moderation completed at the bottom of the page
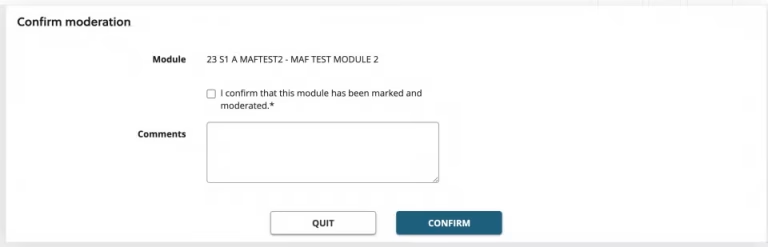
- You will be shown a confirmation screen with an option to add comments
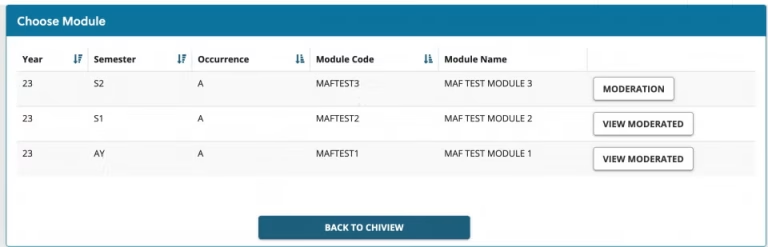
- Once a module has been moderated, you will be able to review the details via the View moderated button
External Examiners
External Examiners will be able to view MAF Online modules, via ChiView
- They will need to have been added onto the module as a marker
- The modules need to have been released to students and assessment team
- The moderator will need to have selected assignments for moderation

- When External Examiners log in, they will be shown a list of available modules
- Select View assessments to view marks/grades and feedback

- The moderator details can be viewed at the top, including their name, the date of moderation and any moderation comments
- The External Examiner can view the Marks, Grades and Feedback for each moderated piece
- Failed assessments will automatically be visible to External Examiners
- Select Back to modules to choose a new module to view
Feedback Bank
The MAF feedback bank allows users to store text statements and documents to a ‘bank’ for future use. This could be helpful when there are blocks of text that you are likely to use repeatedly when giving feedback to students.
Quicklinks:
Adding to, and managing, the feedback bank #
In ChiView, you will see a block entitled ‘MAF Feedback Bank’
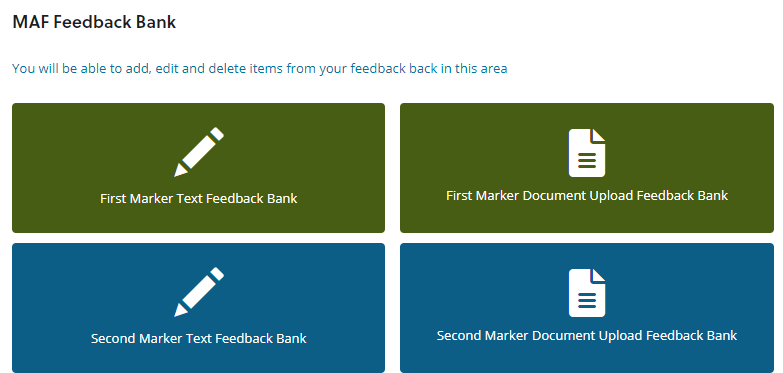
To add text to the First Marker bank, click the button for ‘First Marker Feedback Bank’. You will then see a list of any items you have already added to this bank. In the columns to the right, you will see buttons to edit and delete each of these items, as illustrated below:
At the bottom right of this screen, there will be a button for ‘Add Item’. Select this to add new pieces of feedback to the bank:
You will then be greeted with a new menu:

(The top two drop-down boxes can be left as what they automatically display.)
You can then type in, or copy-and-paste the text you wish to save into the large free-text field. This needs to be plain text and not include any special characters (such as emojis). Foreign language characters are accepted.
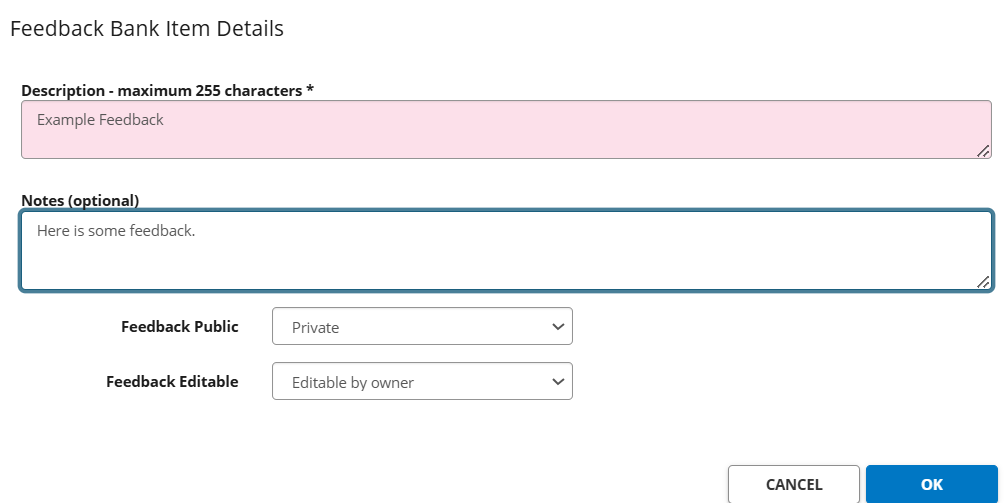
Once complete, click the ‘More Details’ button. This will open a new menu.
In the ‘Description’ field, give the feedback a title. There is also an optional notes field.
Next, choose whether you wish this feedback text to be ‘Private’ or ‘Public’. Please note, setting it to ‘Public’ will make it available across the entire University. This may be useful if you are sharing this feedback with others in your department who may wish to use it. However, we envisage that in most cases this would be set to ‘Private’.
There is then an option to select whether the feedback is later editable or not, and by whom. Select the relevant option between ‘Editable’, ‘Not Editable’, and ‘Editable by Owner’.
Once you are finished, click ‘ok’, and this will close the menu window. Click ‘ok’ again on the remaining menu window. You will then see the feedback item in the list.
These items can then be edited or deleted, if necessary, using the ‘edit’ and ‘delete’ buttons.
First Marker Document Upload Feedback Bank #
MAF also gives users the option to upload feedback to the bank which is in document format. To do this for first marker feedback, select the ‘First Marker Document Upload Feedback Bank’ button.
Any items you have already uploaded will display here. To add a new item, select ‘Add Item’. The top two drop-down menus can be left as what they automatically display.
Select ‘Browse My Computer’ and navigate to the item you wish to upload and select it by double-clicking. (Documents must be under 30mb and be .pdf, .mp3, Excel or Word.) Once you have done that, click ‘Upload’.
Once complete, click the ‘More Details’ button. This will open a new menu.
In the ‘Description’ field, give the feedback a title. There is also an optional notes field.
Next, choose whether you wish this feedback text to be ‘Private’ or ‘Public’. Please note, setting it to ‘Public’ will make it available across the entire University. This may be useful if you are sharing this feedback to others in your department who may wish to use it. However, we envisage that in most cases this would be set to ‘Private’.
There is then an option to select whether the feedback is later editable or not, and by who. Select the relevant option between ‘Editable’, ‘Not Editable’, and ‘Editable by Owner’.
Once you are finished, click ‘ok’, and this will close the menu window. Click ‘ok’ again on the remaining menu window. You will then see the feedback item in the list.
Second Marker Feedback Bank #
To add text or documents to the Second Marker Feedback Bank, please select the relevant Second Marker option button(s), and then follow the same instructions as described for the First Marker Feedback Bank. Please note that Second Marking is only applicable to dissertation-level modules.
Using Banked Feedback #
When you are on the ‘add feedback’ screen, you will see two buttons at the bottom of the menu. One of these is titled ‘Choose from Bank’.

If selecting ‘choose from bank’, you will be given a menu of items in the feedback bank. You can choose the relevant one by using the ‘select’ button in the right-hand column.
Please be aware that using banked feedback will clear whatever is written in the text box. It is advisable in this scenario to copy-and-paste the text currently in the text box into a Word document or blank email, to paste back in after, to avoid loss of the text.
Favouriting feedback #
Users are able to mark items of feedback as ‘favourites’. This makes it quicker and easier to locate and use specific pieces of feedback.
You can favourite a piece of feedback when adding feedback for a student on a module. To do so, click the ‘choose from bank’ button, and next to the piece of feedback you wish to favourite, there will be a star, as shown in the image below. Click the star, and it will change from white to gold.

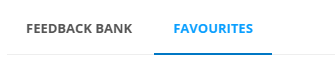
Using favourited feedback #
You can select a favourited feedback item by using the ‘choose from bank’ button, and then changing to the ‘favourites’ page near the top of the screen (as shown in the image below). You will then see your favourite items in a list.
MAF Preferences
It is possible for users to set some MAF preferences so that the system’s layout works best for them.
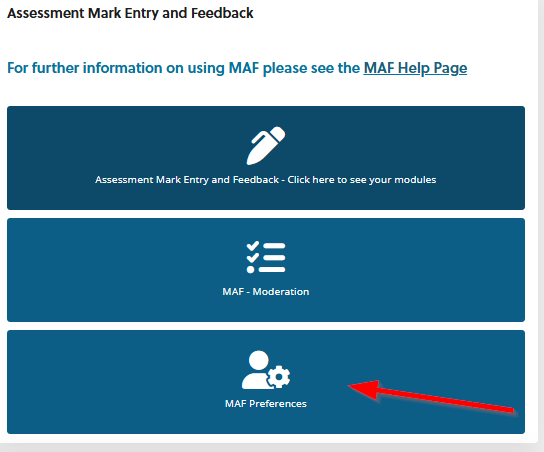
To access this area, from ChiView, select the ‘MAF Preferences’ button:
Once selected, a new screen will appear:

These options relate to the assessments section for any particular module. These panel items (shown in the image below) can be open or closed (expanded or collapsed), with the top one being open by default. Using MAF Preferences, you can adjust which of the below panels are automatically open or closed, to make for an easier experience using MAF. The ‘Always Show Names’ option can also be changed, and relates to student names being shown (or not) within some of these panels.

FAQs
| FAQ | Answer |
| I can’t edit documents once uploaded | This is correct, but was also was not possible in the previous MAF. Documents can be edited then re-uploaded. |
| I can’t see student names in “marks and feedback by assessment” view. | This was a Project Board decision |
| Navigation is particularly time-consuming with large cohorts – I think being able to save settings will help with this | Save settings/preferences is now live. Navigation has been improved as much as possible within the constraints of the system |
| Assessors can’t download copies of feedback uploaded by another assessor | This will be possible after Easter |
| Is there a spell check function? | No, but your internet browser will likely have a built-in spell check for HTML text. |
| I would like to be able to see both the students’ names and ID numbers when they input the marks/feedback, and not just the name or just the ID number. | The Project Board agreed that names would not be shown. However, this will be reviewed in future. |
| For the final year Projects module, there is only the option to input the 1st and 2nd markers’ agreed marks/feedback, and not for both markers to be able to input separate marks and feedback and then come to an agreed mark? | This will be resolved in the new field and functionality that will allow this which will be available in April |
| For all non-dissertation/final year project modules, is it possible to ensure that moderation has been completed before the marks/feedback are released? | The system is designed to be flexible to accommodate different working styles across departments. We are aware, for example, that some departments release marks to students prior to moderation and so this would be down to an agreement in the department around timing for this rather than a system constraint |
| I have column(s) that are missing | Your browser view may be ‘zoomed in’. On Windows, you can ‘zoom out’ by holding Ctrl and tapping the – key. |
| I have a student with a reassessment with multiple pieces of work, but there is only one box? | There will only ever be one box if it is a reassessment, as we only need one overall mark. This has not changed from the old MAF. If the student has submitted two pieces of work, the tutor can put the feedback and individual marks in the body of the MAF form, and then the overall mark in the mark box. If the student has mitigation, that is when boxes will appear for the individual assessments again, depending on what they have failed/not submitted the first time round. |
| I need to edit some feedback but I cannot see the ‘edit’ button? | Once you have clicked the speech bubble icon, and the next screen shows, if there is a scroll bar, make sure this is scrolled to the right. |
| I can’t enter a mark for a resit? | For resits, MAF will only allow tutors to enter a mark of 40% in the mark box (50% for Taught Postgraduate students). If tutors wish to enter the merit mark that the student would have received in the body of the MAF form, they can do so. |