Skip to content
Home
Docs
IT Services
Office 365
Word
Word – Tables
Word – Tables
< 1 min read
Skip to Video
Inserting Tables
Insert Table
: Use the grid in the Insert tab to select the number of rows and columns, or choose “Insert Table” for precise dimensions.
Draw Table
: Create custom layouts by manually drawing cell borders.
Convert Text to Table
: Turn text separated by tabs or commas into a structured table.
Embed Excel Spreadsheet
: Insert an Excel sheet for advanced calculations and functionality.
Picture
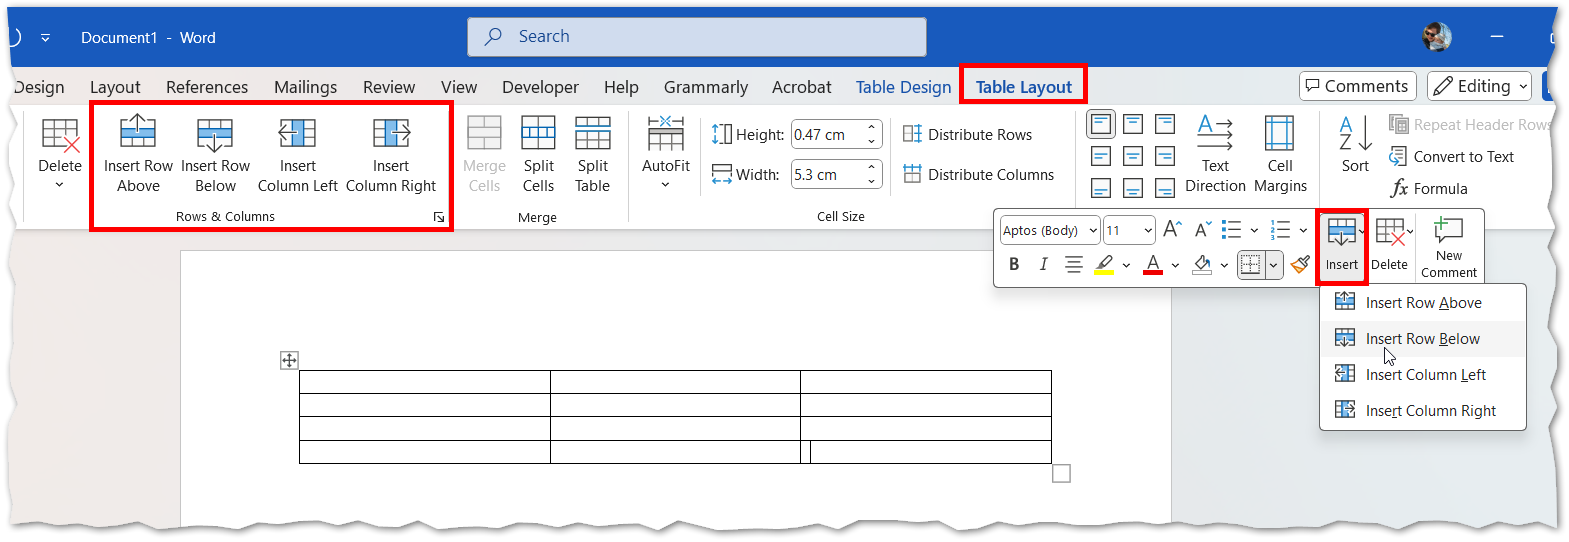
Editing Rows and Columns
Add or Delete Cells
: Use the Layout tab or right-click options to insert or remove rows and columns.
Merge and Split Cells
: Combine cells for headings or split them for detailed layouts.
Resize Precisely
: Drag borders or set exact dimensions under Cell Size in the Layout tab.
Distribute Evenly
: Use the Layout tab to distribute row heights or column widths evenly.
Picture
Formatting and Styling
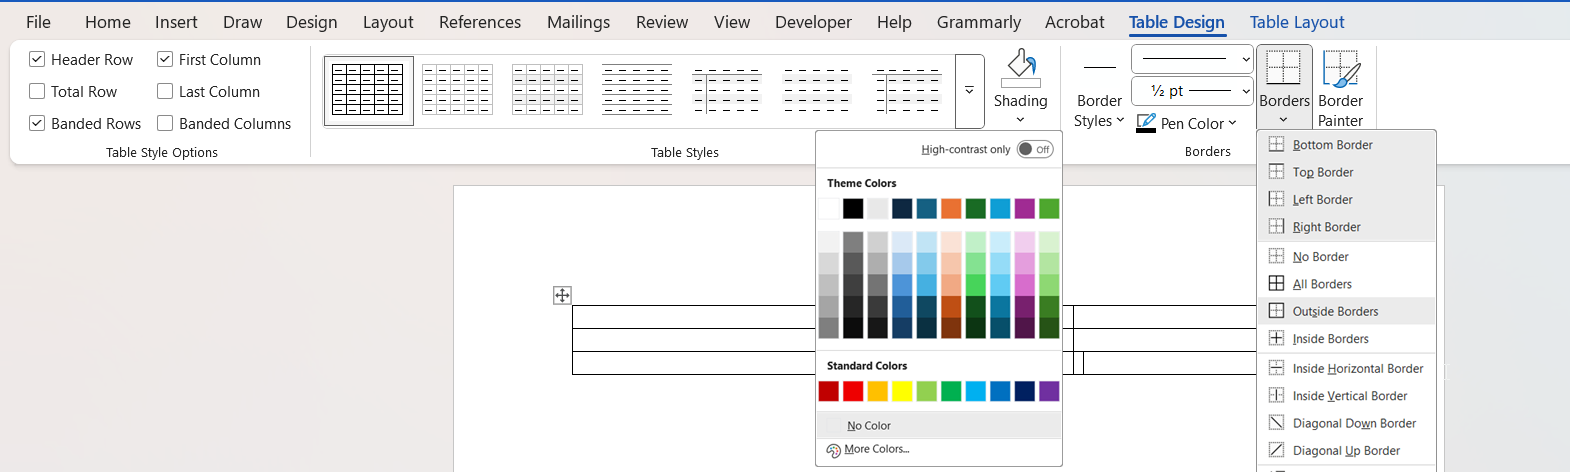
Table Design Tools
: Apply built-in styles, shading, and borders using the Table Design tab.
Custom Borders
: Adjust border styles, thickness, and placement for a polished look.
Cell Margins and Alignment
: Modify padding and text alignment for better readability.
Gridlines
: Toggle non-printing gridlines for easier editing; only actual borders will print.
Picture
Word – Track Changes
Word – Styles
Was this article helpful?
Updated on March 10, 2026